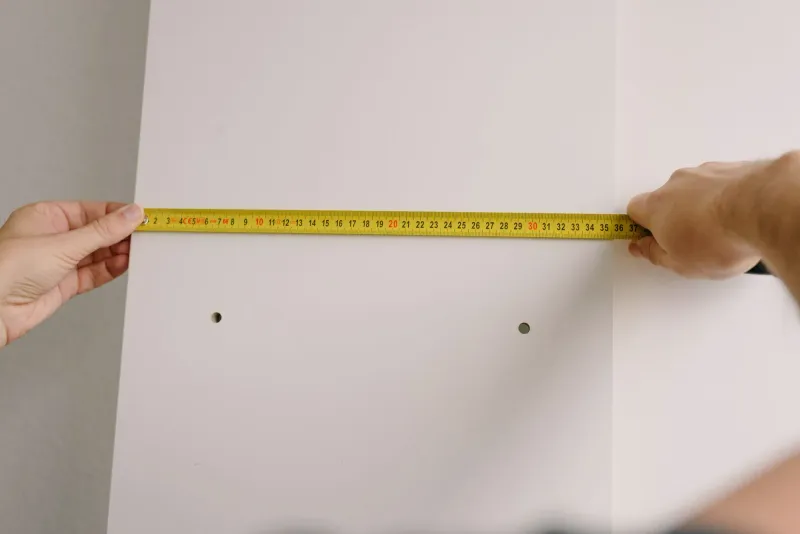
If opening your notebook means closing your laptop, that desk lacks usable space for the way you study. Choose a study desk by checking that you can read, write and use the computer with your materials open together, not just that the furniture fits between the bed and the wall.
The most useful check before buying can happen on a table you already own: mark out the proposed dimensions and arrange your belongings as you actually use them. A product photograph showing a closed laptop cannot answer that question. Neither can a recommended size that ignores what needs to sit on it.
Where these criteria come from
This guide combines official computer workstation advice with practical layout checks. It is not a hands-on product test or a comparison based on customer reviews. The model dimensions mentioned near the end come from our catalog entries and illustrate a difference in size.
Spain’s INSST guidance on computer work describes adapting the workstation to the task and the person using it. OSHA’s desk guidance warns that limited work surface space can force equipment into unsuitable positions.
That is the starting point here: reproduce the task before choosing dimensions and a frame. The tape exercise below is a home layout check, not an official ergonomic test. Workplace recommendations from these sources are not universal furniture size rules for every bedroom or student.
What needs to fit on your study desk
Count the items you use at the same time, not everything you own. Referring to a digital document while taking notes needs a different arrangement from reading a textbook and working through exercises on paper.
Set out your usual combination:
- Laptop and notebook: open the screen to its working position and place the notebook at your writing angle, including any rotation.
- Textbook, notebook and computer: open the book to an interior page. An open book takes more space than its cover suggests, and you need room to turn pages.
- Screen and separate peripherals: include the base or riser, keyboard and mouse movement area. Measuring the monitor’s width alone misses much of the layout.
Add anything that will stay on the surface: a lamp, pencil case, charger or tray. Something stored away and used occasionally does not need a permanent spot. But do not base your purchase on putting it away every time if you normally leave it out throughout a study session.
Prolonged laptop use needs particular consideration. HSE’s good posture guidance recommends a separate keyboard and mouse so the laptop screen can be raised on a riser or similar support. If that will be your arrangement, test the whole setup. Adding peripherals changes the space required; raising the laptop does not remove the riser’s footprint or guarantee notebook space underneath.
How to choose a study desk: test the layout
Mark a rectangle with low-tack tape on an existing table large enough to hold it. Check that the tape will not damage the finish first. Align the front of the rectangle with the table’s actual edge where you sit. Keep materials and forearm support within the marked area during the trial: the spare surface is not part of the proposed desktop.
Sit in a chair at a stable table for the trial. You can then use the objects during a normal task; an outline on the floor would only show whether their footprints fit.
- Mark width and depth. Start with the dimensions of a desk you are considering. Write them down so you do not mix them up when comparing another option.
- Arrange your open materials. Include connected cables and side plugs. Do not squeeze in an unplugged laptop if you will use it while charging.
- Do a short, representative task. Refer to the book, write a few lines, turn a page and use the mouse. Notice what you need to move and why.
- Try a different arrangement. Shift secondary objects before enlarging the rectangle. The pencil case can move; your writing area should not be relegated to a spare corner.
- Record the remaining conflict. You may need space beside the computer, behind the notebook or underneath the desk. These problems call for different solutions.
Try switching tasks too if you use the same space for studying and remote work. Can you move from keyboard to notebook by shifting one item, or do you need to dismantle the whole setup? Everything need not remain open permanently, but know what that change involves before buying.
An overhead photograph helps you remember the arrangement that worked. Include the tape measure and note anything left out. Otherwise, you might compare a trial containing a lamp and textbook with one that only worked because you cleared everything away.
What this check cannot tell you
The exercise checks surface layout, not the future desk’s stability, strength or comfort. It also does not reproduce drawers, crossbars or legs. A dining table may let your knees move through space that the proposed desk fills with a drawer unit.
If the trial table is a different height, do not use it to predict your posture at the new desk. For that decision, use the desk and chair height guide and check the dimensions of the combination you choose. This exercise identifies space conflicts; it does not replace a separate height check.
Study desk dimensions: width is not depth
Width gives you room to arrange objects side by side. Depth is the distance from the edge where you sit to the back of the desktop. Gaining one does not automatically compensate for a shortage of the other.
As a hypothetical size comparison, a 140 x 60 cm top, about 55.1 x 23.6 inches, provides 20 cm or roughly 7.9 inches more width than a 120 x 60 cm top, about 47.2 x 23.6 inches. Both retain the same depth. That extra side strip may help a particular layout, but does not itself separate the screen from the notebook or guarantee your equipment will fit.
If your notebook overlaps the keyboard during the trial, identify why. Perhaps you lack depth to place them one behind the other; perhaps you are trying to keep two active working areas in the same spot. More width only helps if you can move some materials sideways without leaving yourself writing awkwardly off to one side.
Check what occupies the back of the desk too. A monitor stand, angled laptop riser or built-in shelf can consume some of the advertised depth. Gaps behind those objects count toward the overall area, but may not be usable for an open book.
Do not reject a desk because it is labeled small, or accept one because it is labeled large. Look at the accessible rectangle left after arranging your equipment. If freeing space depends on a monitor arm, confirm that the desktop can accept its mounting hardware rather than assuming the product photo settles it.
Drawers, legs and the surface below your papers
A drawer adds storage but may take away room to pull yourself close. Look for a dimensioned drawing or underside photograph, not just a front view with the chair tucked away. The desk’s overall width is not the clear space between legs or drawer units.
Check where your knees and feet would go, whether the chair arms let you pull in, and whether you can shift position. Include a footrest if you use one. A bin or stack of books underneath also occupies this space, even though it is not part of the furniture.
OSHA recommends keeping the space needed for legs and feet clear, and suggests removing center drawers when additional thigh clearance is needed. Treat that as a reason to assess obstructions, not permission to remove any drawer: if it is structural, ask the manufacturer before altering it.
For the top itself, prioritize a surface that lets you write without the paper catching on a seam or pronounced texture. Check the front edge and where your forearms will rest. If you need a writing mat, include it in the trial because its footprint also affects the layout.
My own desk is a fixed DIY assembly with a solid wood top and IKEA legs. I mention it because choosing the top and legs separately is a real option, not because solid wood is essential for studying. Buying separate parts means checking the joints and underside clearance, rather than simply ordering a top that fits the room.
Position the desk with the screen switched on
If you study on a computer, start by trying the desk with the window to one side. OSHA’s workstation environment guidance recommends placing the face of the screen at right angles to windows and light sources, and avoiding task lighting that reflects in the display.
That does not mean every side-on position works at every hour. Check the spot at your usual study time, with the screen on and a book open. Look for reflections and writing shadows, and consider whether you need a blind or a different lamp angle.
Also check that you can open the window, pull the chair out and reach the outlet without running a cable across a walkway. The small-apartment home office guide covers arranging the wider room. Do not sacrifice everyday access just to squeeze the desktop into a tight gap.
Color comes after those checks. The sources used here do not justify claims that a white, green or wood-colored desk improves concentration. Choose a finish you like, then assess how it reflects the actual light in your room. A photograph under studio lighting cannot show that for you.
Fixed or standing desk: resolve the surface first
A fixed desk can support seated study if it works with your chair and accommodates your materials. Height adjustment is worth considering when you want to switch between sitting and standing, or adjust the desk for different users. It does not fix a narrow top or a drawer unit in the wrong place.
If you need that adjustment, consult the standing desk buying guide for the technical selection criteria. Then use the desk finder to help compare height-adjustable options, not as a replacement for your layout trial.
Only for that situation, two catalog examples offer a size comparison: the DEVAISE 120x60 entry records a 120 x 60 cm top, about 47.2 x 23.6 inches, while the SONGMICS LSD134 entry records 140 x 60 cm, about 55.1 x 23.6 inches. These are standing desks, not fixed-desk recommendations, and I have not tested either model.
These measurements were recorded in July 2026 and have not been rechecked for this guide. Confirm the exact variant and dimensions before buying. They are Spanish catalog examples: the same models or variants may not be available in the US or your local market. The comparison shows extra width at unchanged depth, not proof that a particular laptop, book and notebook arrangement will fit.
What to take with you when shopping
Keep the dimensions that worked, a photograph of the layout and a note of the underside obstructions you cannot accept. Add whether you need adjustable height or a fixed desk will work. This lets you reject models for specific reasons rather than choosing from styled photographs.
Before paying, compare the furniture drawing with your trial and read the return conditions. If the gap between drawer units is missing or the crossbar is not visible, ask the seller for that detail. Overall width does not tell you either.
You are ready to choose when you know where each item used simultaneously will go and what will stay stored away. If you still need to close the textbook before writing, revisit the layout before choosing the furniture.
Header photo: cottonbro studio on Pexels. Illustrative stock photo, not the author’s desk.